Learn The Best Deck Maintenance Tips And Tricks For Your Omaha Home

Ever felt like your deck needs a little extra TLC? Well, you’re not alone. Maintaining your deck doesn’t have to be a head-scratcher. Think of it as giving your outdoor area a bit of a spa day – minus the cucumber eye masks.

Today, we’re going to give you the best tips for deck maintenance, breaking them down into simple, actionable tips. No need for a superhero cape; just grab your regular tools, and get ready to elevate your deck game. Trust us; your deck will thank you with years of steadfast service. Let’s get started!
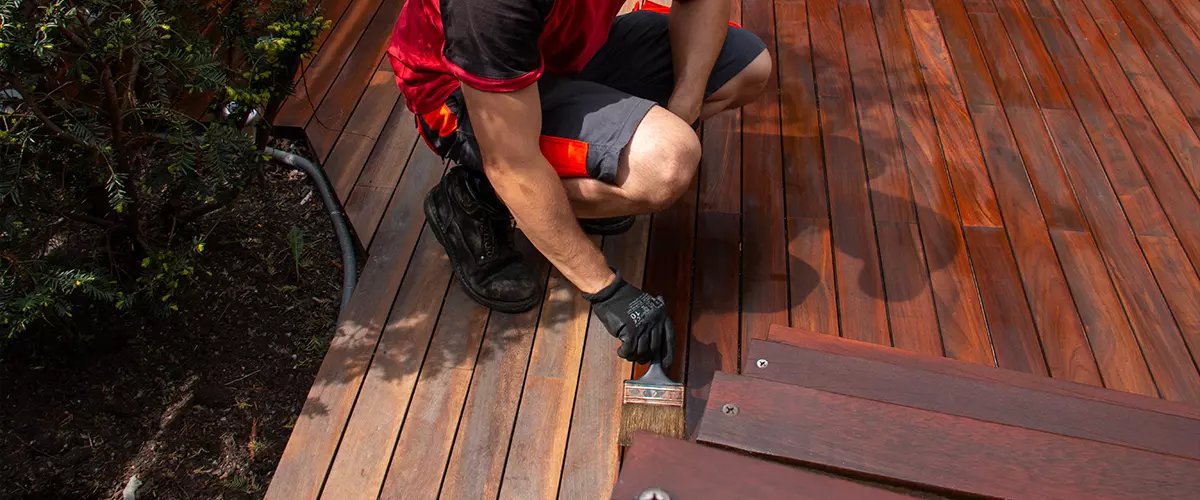
Ipe hardwood deck annual refreshing, man with paintbrush applying natural nourishing oil on cleaned and sanded Ipe decking terrace boards

Safety Is The Number One Priority

Before diving into the hands-on part of deck maintenance, let’s talk safety. First and foremost, equip yourself with the essentials: sturdy gloves to shield your hands, safety goggles to keep those peepers safe from debris, and a trusty mask to filter out any dust particles.

If your maintenance involves cleaning solutions or sealants, make sure your workspace is well-ventilated. Also, don’t forget to wear non-slip shoes – a simple yet crucial step to prevent accidental slips and tumbles.

Lastly, check the weather forecast; you don’t want unexpected rain or scorching sun throwing a curveball into your maintenance plans. Remember, the goal here is not just a polished deck but a safe and sound maintenance session. Suit up, and let the maintenance begin!

Work safety protection equipment. Industrial protective gear on wooden table, red color background.

Why Deck Maintenance Is About Protecting Your Expense

Your deck, often the unsung hero of outdoor spaces, silently withstands the elements, supporting countless gatherings, family barbecues, and moments of quiet contemplation. Yet, it’s easy to overlook its resilience and forget that even the sturdiest structures need a bit of care. Here’s the real talk – deck maintenance isn’t just about vanity; it’s a vital step in ensuring your outdoor retreat stands the test of time.

You and your family’s safety is the number one reason for doing regular deck maintenance. You don’t want to end up in a situation where you’re hosting a barbeque and suddenly the mood shifts abruptly because of a wobbly railing or a loose board.

Ensuring the safety of your loved ones is the paramount reason why deck maintenance matters. Regular check-ups catch potential hazards early, allowing you to address issues before they become safety concerns.

Maintenance helps your deck last longer, and that’s a fact. Just like a fine wine, your deck can age gracefully – but only with a little care. Regular maintenance prevents common issues like rotting, warping, or the gradual decay of materials. By investing a bit of time and effort, you’re essentially extending your deck’s lifespan, ensuring it remains a steadfast companion through seasons of sun, rain, and everything in between.

You’ll have the best-looking deck on the block! While we’re not big fans of keeping up with the Joneses, we feel like it’s normal to want your deck to look good! After all, you invested so much money into it, so it makes sense to want to keep it good-looking.

paper house contractor handshake

Deck Inspection 101

Now that we’ve got our safety gear on, let’s start with inspecting your deck. This is the phase where you channel your inner Sherlock and look for clues, or in our case, potential issues that could turn into major headaches down the road.

1. The Sherlock Stroll: Visually Checking Your Deck

Begin your investigation with a casual stroll around your deck. Keep an eye out for any noticeable shifts in the deck’s alignment, wobbling railings, or suspiciously soft spots underfoot. These can be early signs of structural issues that need attention.

2. The Tap Test: Sounding Out Trouble

Think of your deck like a musical instrument – give it a tap, and it should sound solid. Use a rubber mallet or the back of a screwdriver to gently tap on various areas of your deck. A hollow sound could indicate rot or decay in the wood.

3. Checking the Fasteners & Connectors

Inspect all fasteners and connectors, looking for rust or corrosion. Rust weakens the integrity of these crucial components, jeopardizing the overall stability of your deck. Tighten loose screws and replace any that show signs of rust.

4. Look Out For Water Damage

Water damage is a common culprit in deck woes. Look for water stains, discoloration, or soft spots on the wood. These are red flags that water has found its way into places it shouldn’t be.

5. Thoroughly Look Out For Mold

Mold and mildew can quietly set up shop on your deck, especially in damp areas. Keep an eye out for discolored patches or a musty odor, signaling the presence of these unwelcome guests.

6. The Boardwalk Check: Assessing Deck Boards
Inspect each deck board for signs of warping, cracking, or splintering. These seemingly minor issues can escalate if left unchecked, leading to a less-than-stellar deck surface.
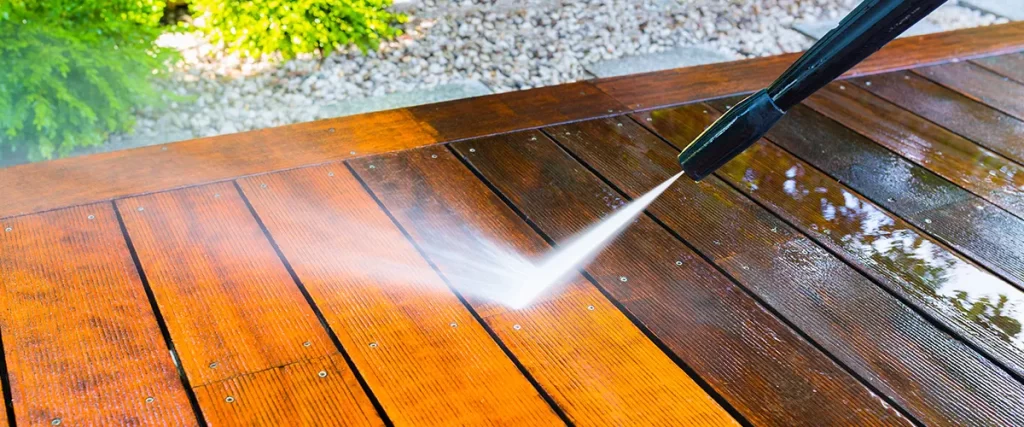
pressure wash for decking

Cleaning Your Deck: Easy DIY Solutions

Now that we’ve ensured the safety of your deck and scrutinized its structural elements, it’s time to roll up our sleeves and give it a good, old-fashioned cleaning. Cleaning not only rejuvenates the look of your deck but also plays a crucial role in preserving its materials. Here’s a simple guide to DIY deck cleaning, using items you probably already have in your cleaning arsenal.

Gentle Soap and Warm Water: The Dynamic Duo

Start with the basics – a mild dish soap and warm water. Mix a solution in a bucket, ensuring it’s not too concentrated. Using a soft-bristle brush or mop, gently scrub the deck surface. This method effectively removes everyday dirt, grime, and spills without causing damage to the wood.

Vinegar For Mild Stains

For those stubborn stains that refuse to budge, turn to the magic of vinegar. White vinegar, mixed with water, creates a potent stain-fighting solution. Apply it directly to the stained area and let it sit for a few minutes. Then, scrub away with a brush. This concoction works wonders on everything from food spills to mildew spots.

Pressure Washer Power: Use with Caution

If your deck needs a deeper clean, a pressure washer can be your ally. However, exercise caution – high pressure can damage the wood if not used properly. Keep the nozzle at a safe distance, and use a wide spray pattern to avoid concentrated pressure. This method is excellent for removing ingrained dirt and grime from the deck’s surface.

Baking Soda For Tougher Stains

For particularly stubborn stains or areas with mold and mildew, baking soda comes to the rescue. Create a paste by mixing baking soda with water and apply it to the affected area. Let it sit for a while before scrubbing. Baking soda is a gentle yet effective abrasive that can tackle tough stains without harming the wood.

Rinse and Repeat: Thoroughly Wash Away

After the scrubbing and stain-fighting heroics, it’s time for the final act – rinsing. Use a garden hose or a bucket of clean water to thoroughly rinse the deck. Ensure no cleaning solution residue is left behind. This step is vital to prevent any potential damage from lingering chemicals.
Ipe hardwood deck annual refreshing, man with paintbrush applying natural nourishing oil on cleaned and sanded Ipe decking terrace boards

Protecting Your Deck From The Elements - Waterproofing Basics

After giving it a deep clean, your deck is ready for the next step: protection.

1. Choose the Right Sealant: Your Deck's Best Friend

The first line of defense in waterproofing your deck is a quality sealant. Choose a sealant specifically designed for your deck’s material – whether it’s wood, composite, or another type. The sealant forms a protective barrier, preventing water from seeping into the pores of the wood or causing damage to other materials.

2. Clear the Deck: A Blank Canvas for Waterproofing

Before applying the sealant, ensure your deck is clean and dry. A freshly cleaned deck allows the sealant to adhere better, maximizing its effectiveness. Sweep away debris, dirt, and leaves, and let the deck air-dry completely.

3. Application Magic: How to Seal the Deal

Now comes the fun part – applying the sealant. Whether you opt for a brush, roller, or sprayer, make sure the application is even and thorough. Pay special attention to areas prone to water accumulation, such as joints, seams, and around railings. Don’t rush this process; a meticulous application ensures comprehensive coverage.

4. Regular Reapplication Is Crucial

While sealants provide robust protection, they aren’t invincible. Plan for regular reapplications to maintain the shield. The frequency depends on factors like climate, deck usage, and the type of sealant used. As a rule of thumb, consider reapplying every 1-3 years for optimal protection.

5. Address Repairs Promptly: Patching Up Leaks

Even with the best sealant, wear and tear can occur. Promptly address any issues like peeling or damaged sealant to prevent water infiltration. Regular inspections allow you to catch these issues early, ensuring your deck remains watertight.

By mastering the basics of deck waterproofing, you’re not just shielding your deck
from the elements – you’re investing in its longevity and preserving its aesthetic charm.
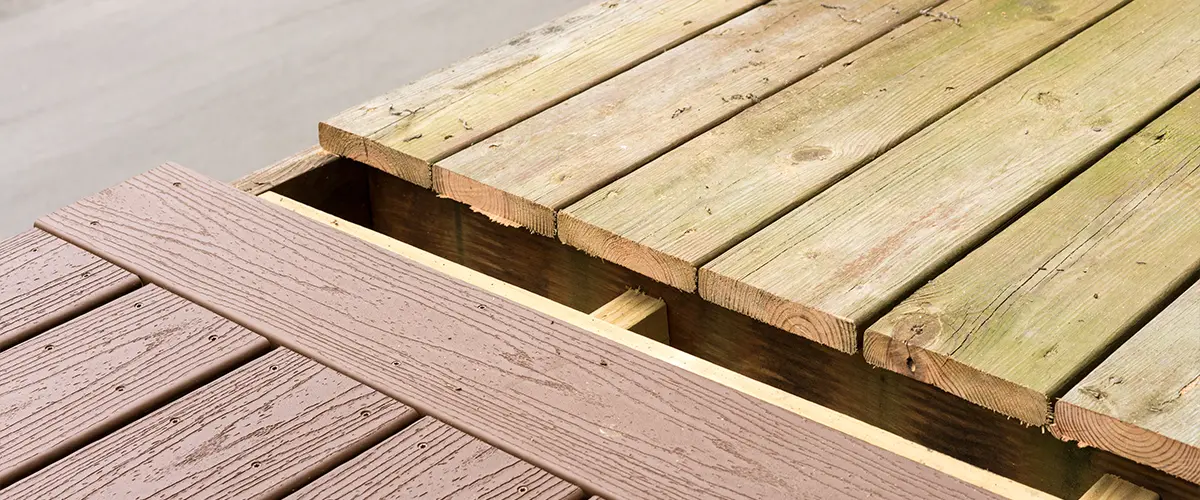
Replacing wood deck with composite

Replacing Damaged Boards - Step By Step Guide

Word of warning! Replacing boards can be complicated if you’re not sure what you’re doing and can even result in injury. If you are on the fence about doing this, it’s best to leave it for the professionals. Feel free to contact us at (402) 369-5724 for any deck needs.

Even with regular maintenance, wear and tear can leave its mark on your deck. Fear not – board replacement is your ace in the sleeve, offering a swift and effective solution to keep your deck in top-notch condition. Let’s delve into the steps of board replacement:

1. Spotting the Culprits: Identifying Damaged Boards

Begin your board replacement mission with a thorough inspection. Look for boards showing signs of distress – warping, splintering, or visible decay. These are the troublemakers that need eviction from your deck arena.

2. Deck Surgery: Safely Removing Old Boards

Equipped with a power drill or a screwdriver, carefully remove the screws or nails securing the damaged board. Exercise caution to avoid damaging surrounding boards during this delicate operation. If the board is stubborn, a pry bar can be your trusty ally in easing it out.

3. Choosing The Right Board Size

Once the damaged board is out of the picture, measure its dimensions precisely. This ensures that the replacement board seamlessly integrates with its deck comrades.

4. The Perfect Match: Selecting Replacement Boards

Opt for boards that match the material, color, and grain pattern of the existing deck. This cohesive approach maintains the visual harmony of your deck.

5. Secure and Seal: Attaching the New Board
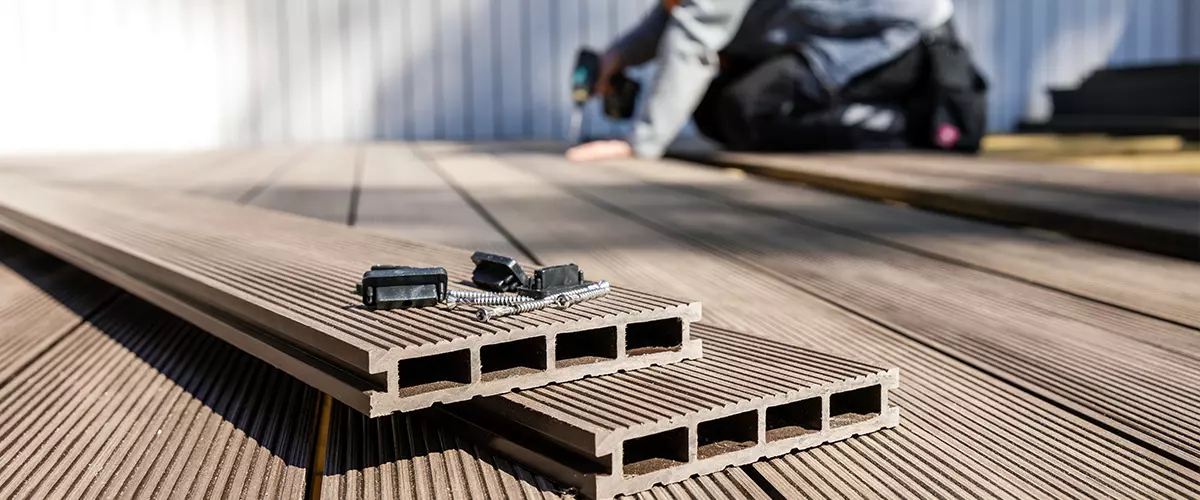
With your replacement board in hand, secure it in place using appropriate screws or nails. Ensure a snug fit, and if necessary, sand the edges to match the contour of the surrounding boards. If you’re feeling extra protective, consider applying a sealant to the replacement board to fortify its resilience.
wpc terrace construction - worker installing wood plastic composite decking boards, maintenance tips and tricks

Consistency is Key

If you follow this routine and use the tips we talked about in this blog post, we can almost guarantee that your deck will look and perform much better in time. If you can prevent an issue, it’s going to save you a lot of time and money down the line.

If you require assistance with maintenance or any other deck-related task like deck building, installing, or repairing, feel free to reach out to us at Deck Bros: (402) 369-5724.